677 Messages
•
44.6K Points
Can I Secure My Homestead Website With HTTPS?
For SITEBUILDER PLUS ONLY. Do not use if you have Website Builder.
If you have a Simplestore using Sitebuilder Plus, DO NOT PROCEED WITH THIS PROCEDURE.
For more information please read this topic:
https://community.homestead.com/homestead/topics/cloudflare-common-cloudflare-issues
Important: When we update the nameservers, it is possible to see some interruption with the website and email as the settings propagate. This is to be expected, but if it has been more than 24 hours, please contact support and we can assist.
*click on images to enlarge*
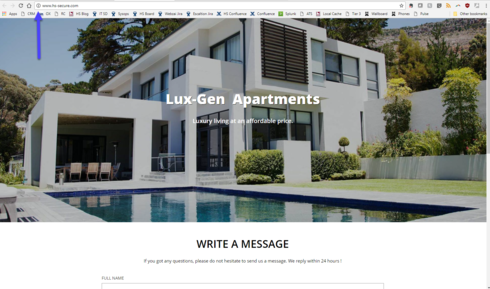
This topic addresses displaying a "secure" rating in the address bar. Currently your site shows an information icon to the left of your URL. If you click it, the message will say the site is not secure.
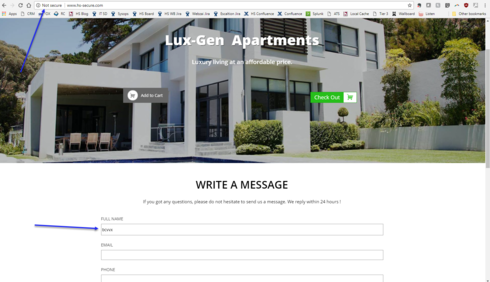
If you have a contact form this is important. As soon as you begin filling in a field in the form, the browser will display a more obvious message in the address bar.
To secure your site you will need to update your nameservers using Cloudflare. Below are detailed instructions on correctly configuring this so your website will be secure and your customers will feel more confident providing you their contact information.
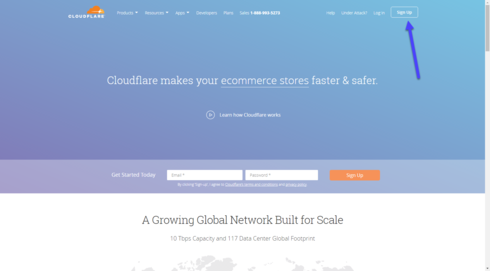
1) Go to http://www.cloudflare.com and click on the sign up link.
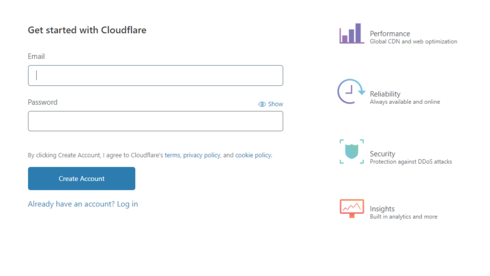
2) Please enter your email address and password you wish to use for your Cloudflare account. If possible, please do not use an email address connected to your domain.
We strongly recommend you read the term and conditions. To continue you must agree to the terms and conditions by clicking on create account.
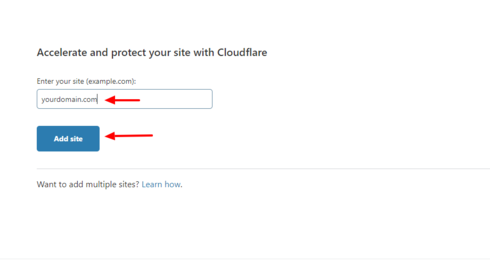
3) Enter your domain name and click on Add site
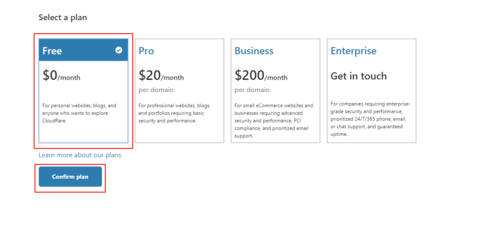
4) Select the FREE plan and click Confirm Plan.
5) Cloud flare will scan your current DNS settings and automatically populate the found DNS records. When the scan is complete, and you see all records present, click continue .
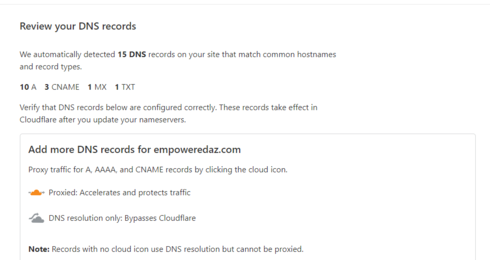
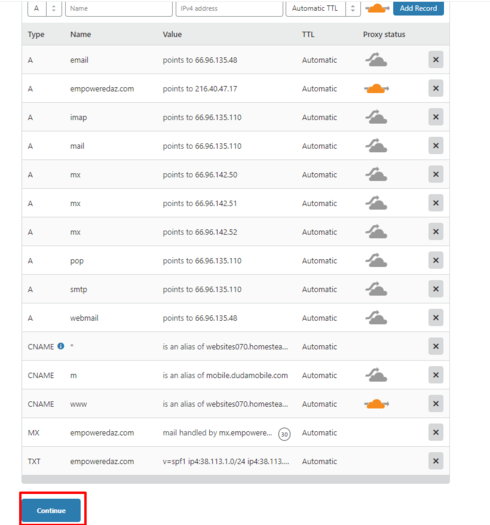
6) Compare the DNS records Cloudflare scanned to your existing DNS records. These can be found in your Homestead account, under Domains > Advanced DNS settings. They should match. If they do, click Continue.

If they don't, you can click on the name or value inside of Cloudflare that is incorrect and edit it. If you need help viewing your current DNS records, please see our topic, How can I view and edit my DNS records using Homestead nameservers.
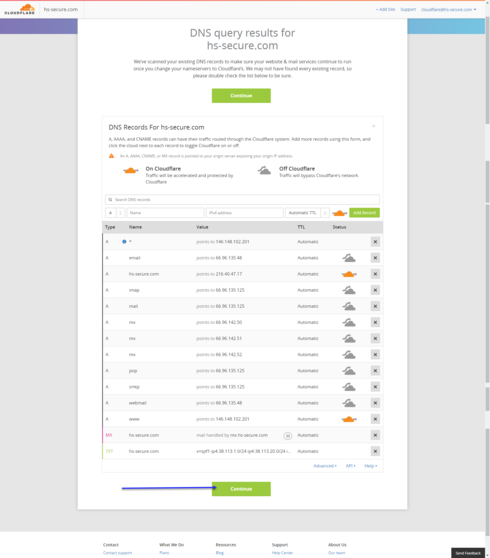
NOTE: Please make sure to verify that the MX record has been added inside of CloudFlare's DNS settings. If you do not see a record with MX next to it, then we will need to add the MX record.

Click MX in the drop down, then click Name and type @, then Click to configure just right of that box. It will open a new window, please confirm your MX record.
If you are using email with Homestead, for server you will add mx.YOURDOMAIN.com, and for Priority you can put 10. Click save, then click Add Record.

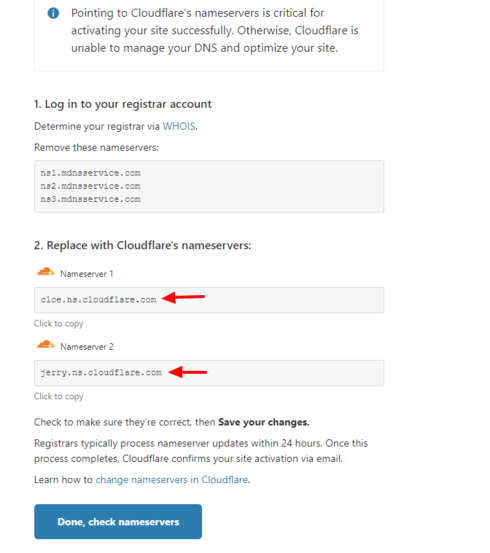
7) Cloudflare will now provide you the new nameservers for your domain. If you do not see your nameservers, proceed to the DNS page inside of Cloudflare, and scroll down until you see Cloudflare Nameservers.
Important: When we update the nameservers, it is possible to see some interruption with the website and email as the settings propagate. This is to be expected, but if it has been more than 24 hours, please contact support and we can assist.
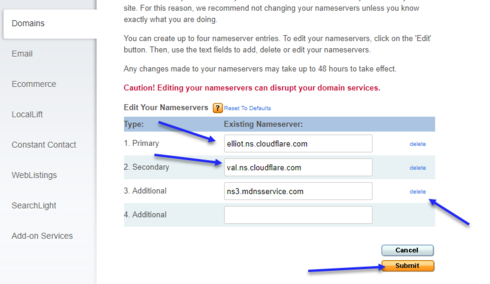
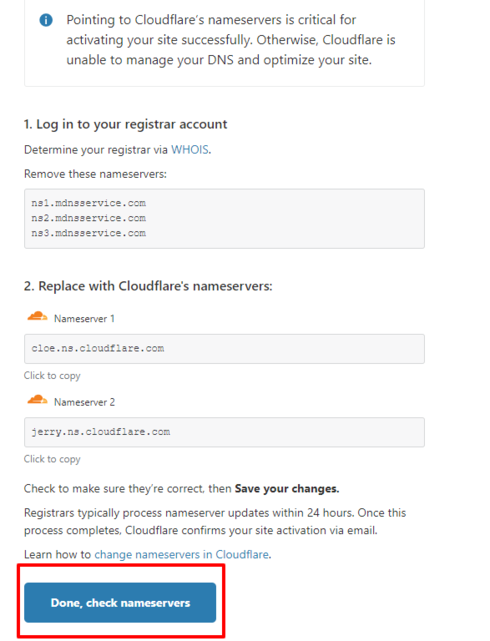
8) Log into your Homestead account and click the domains tab on the left. Under the domain you are working on, click Edit your nameservers. You will need to click delete next to ns3.mdnsservice.com and then change the other 2 nameservers to the ones provided by Cloudflare. You can't change and delete in the same step, so you will need to click edit twice. Click Submit
9) Return to Cloudflare and click done check nameservers.
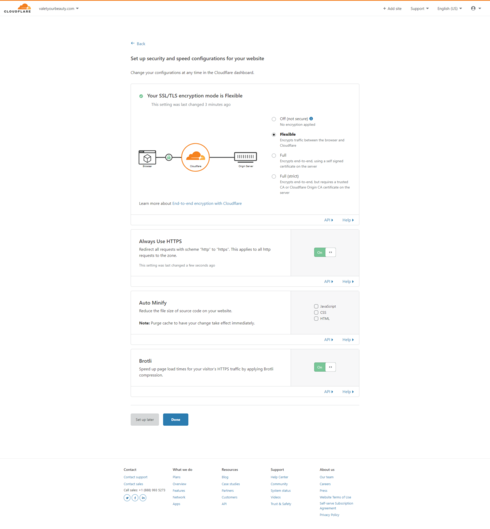
10) The first part is now completed. Now, please review and confirm that the SSL is set to Flexible and always use HTTPS is turned on.
11) Over the next 24 hours, try manually typing in your site with https. If it isn't set up yet, you'll get an error page. Just type https://www.yourdomain.com and when you see your site load with HTTPS, please proceed to the next step.

NOTE: Do not proceed to the next step until you can view your website when using HTTPS (https://www.yourdomain.com) When you see your site load with HTTPS, continue to step #12.
12) Click on the SSL/TLS button at the top and select Edge Certificates.
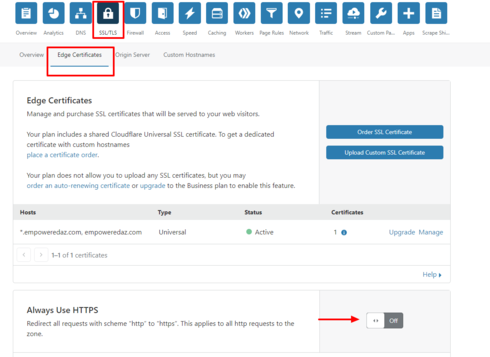
13) Scroll down on this page and look for the section entitled "Always use HTTPS" Turn it on. Also scroll to the bottom and find "Automatic HTTPS Rewrites" Turn it on. All other settings you can leave as default.

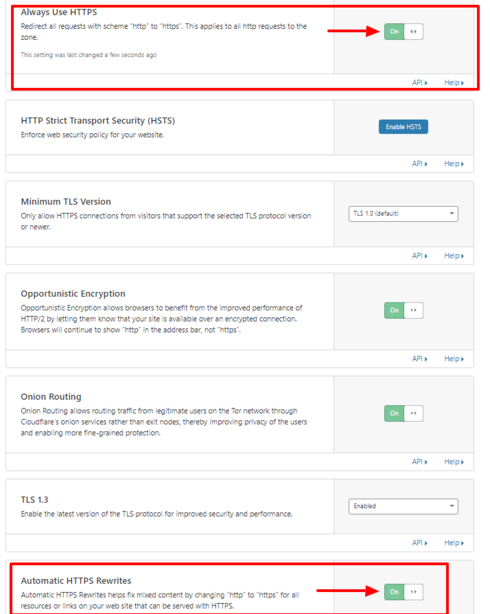
In a few minutes, your site will show secure.
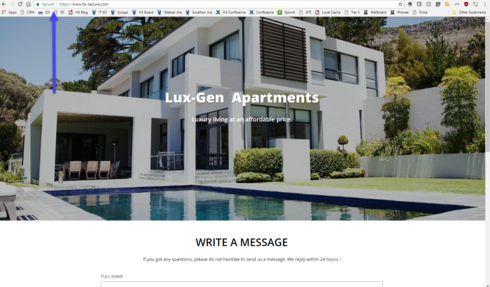
If your site is not showing fully secure, please go republish your site.
Note: This solution is for Sitebuilder Plus sites only.
If you have a Simplestore using Sitebuilder Plus, DO NOT PROCEED WITH THIS PROCEDURE.
For more information please read this topic:
https://community.homestead.com/homestead/topics/cloudflare-common-cloudflare-issues
Important: When we update the nameservers, it is possible to see some interruption with the website and email as the settings propagate. This is to be expected, but if it has been more than 24 hours, please contact support and we can assist.
*click on images to enlarge*
This topic addresses displaying a "secure" rating in the address bar. Currently your site shows an information icon to the left of your URL. If you click it, the message will say the site is not secure.
If you have a contact form this is important. As soon as you begin filling in a field in the form, the browser will display a more obvious message in the address bar.
To secure your site you will need to update your nameservers using Cloudflare. Below are detailed instructions on correctly configuring this so your website will be secure and your customers will feel more confident providing you their contact information.
1) Go to http://www.cloudflare.com and click on the sign up link.
2) Please enter your email address and password you wish to use for your Cloudflare account. If possible, please do not use an email address connected to your domain.
We strongly recommend you read the term and conditions. To continue you must agree to the terms and conditions by clicking on create account.
3) Enter your domain name and click on Add site
4) Select the FREE plan and click Confirm Plan.
5) Cloud flare will scan your current DNS settings and automatically populate the found DNS records. When the scan is complete, and you see all records present, click continue .
6) Compare the DNS records Cloudflare scanned to your existing DNS records. These can be found in your Homestead account, under Domains > Advanced DNS settings. They should match. If they do, click Continue.
If they don't, you can click on the name or value inside of Cloudflare that is incorrect and edit it. If you need help viewing your current DNS records, please see our topic, How can I view and edit my DNS records using Homestead nameservers.
NOTE: Please make sure to verify that the MX record has been added inside of CloudFlare's DNS settings. If you do not see a record with MX next to it, then we will need to add the MX record.
Click MX in the drop down, then click Name and type @, then Click to configure just right of that box. It will open a new window, please confirm your MX record.
If you are using email with Homestead, for server you will add mx.YOURDOMAIN.com, and for Priority you can put 10. Click save, then click Add Record.
7) Cloudflare will now provide you the new nameservers for your domain. If you do not see your nameservers, proceed to the DNS page inside of Cloudflare, and scroll down until you see Cloudflare Nameservers.
Important: When we update the nameservers, it is possible to see some interruption with the website and email as the settings propagate. This is to be expected, but if it has been more than 24 hours, please contact support and we can assist.
8) Log into your Homestead account and click the domains tab on the left. Under the domain you are working on, click Edit your nameservers. You will need to click delete next to ns3.mdnsservice.com and then change the other 2 nameservers to the ones provided by Cloudflare. You can't change and delete in the same step, so you will need to click edit twice. Click Submit
9) Return to Cloudflare and click done check nameservers.
10) The first part is now completed. Now, please review and confirm that the SSL is set to Flexible and always use HTTPS is turned on.
11) Over the next 24 hours, try manually typing in your site with https. If it isn't set up yet, you'll get an error page. Just type https://www.yourdomain.com and when you see your site load with HTTPS, please proceed to the next step.
NOTE: Do not proceed to the next step until you can view your website when using HTTPS (https://www.yourdomain.com) When you see your site load with HTTPS, continue to step #12.
12) Click on the SSL/TLS button at the top and select Edge Certificates.
13) Scroll down on this page and look for the section entitled "Always use HTTPS" Turn it on. Also scroll to the bottom and find "Automatic HTTPS Rewrites" Turn it on. All other settings you can leave as default.
In a few minutes, your site will show secure.
If your site is not showing fully secure, please go republish your site.
Note: This solution is for Sitebuilder Plus sites only.


vincent8294
3 Messages
•
152 Points
7 years ago
http://www.reelsportfishingcharters.com
0
0
long8581
2 Messages
•
142 Points
7 years ago
So how do you convert the website over to HTTPS?
Note: This conversation was created from a reply on: How do I make my site secure.
0
0
veronica4546
2 Messages
•
120 Points
7 years ago
1
0
hannes0245
8 Messages
•
234 Points
7 years ago
Unable to open mail contact links on my website
1
0
manuel9083
5 Messages
•
250 Points
7 years ago
It worked for my site www.ardilalaw.com. My site is showing on a https. But, chrome says the connection is in status of “Info or Not secured”. It does not say it is a dangerous connection, just not quite secured.
How to I upgrade to “Secure”?
Thanks is advance
3
0
ken4887
2 Messages
•
120 Points
7 years ago
https://www.ehlencontracting.com/
1
0
tammy6738
1 Message
•
110 Points
7 years ago
0
0
mitchell2929
2 Messages
•
142 Points
7 years ago
It's been over 24 hours since I set up Cloudflare.
9
0
judith4708
10 Messages
•
534 Points
7 years ago
1
0
schnauzer_lover
8 Messages
•
258 Points
7 years ago
6
0
wendy8827
10 Messages
•
316 Points
7 years ago
1
0
anthony8894
7 Messages
•
388 Points
7 years ago
After reading comments, I deleted the FB button & YouTube button. Not much left!? ;)
0
0
michele_r4628
15 Messages
•
538 Points
7 years ago
Changing our sites from HTTP to HTTPS - per Google's mandatory requirement. How is Homestead handling this for their website Clients? I never received any email guidance from Homestead on this important issue -- and I believe that Google's deadline for this was July 1, 2018.
1
0
faye5486
15 Messages
•
406 Points
7 years ago
9
0
danni2136
18 Messages
•
976 Points
7 years ago
7
0